Try Default

See how revenue teams automate revenue operations with Default.

Key Takeaways
Automated lead nurturing is supposed to accelerate and scale prospect followup. But even the leaders in RevOps software category struggle to follow through on this promise. Specifically, the lead nurturing tools in HubSpot have their challenges: inflexibility, trouble with integrations, and complex setup procedures for relatively straightforward logics.
If you’re struggling to get the most out of HubSpot’s lead nurturing tools, this guide is packed with best practices and step-by-step workflow instructions to help get your inbound sales processes unstuck.
For a more flexible and integrated solution to automate and scale your follow-up, explore Default's complete Sales Workflow Software.
What is lead nurturing?
Lead nurturing is the process of continually communicating and building relationships with potential customers—both pre- and post-qualification. The goal of lead nurturing is to keep your brand in front of your ideal buyers. That way, when they’re ready to buy, you’re top-of-mind.
The exact terminology for lead nurturing varies by organization. Alternative names include marketing automation, drip campaigns, funnel marketing, engagement campaigns, and more. Whatever you call it, the advantages are the same:
- Higher conversion rates, as building trust with your audience makes them more likely to convert into paying customers
- Reduced churn, as ongoing communication leads to more educated buyers that value your product
- Improved marketing and sales ROI as you generate more business from the leads you’ve paid for
You’ll almost certainly use some kind of automation or workflow tool (like HubSpot) to qualify, score, distribute, and nurture your leads. That’s where we’ll spend the bulk of our time in this article.
But it’s worth noting that lead nurturing can also include non-digital tactics: in-person events, on-site visits, customized direct mail packages, and more. You’ll usually find these when engaging in ABX or enterprise sales.
How to set up HubSpot lead nurturing
Setting up HubSpot lead nurturing can be as simple or complex as you need. Here are nine simple steps to get started.
Note: To take full advantage of HubSpot Workflows, you’ll need access to Marketing Hub Professional or Enterprise. What’s more, every contact you enroll in a Workflow will be classified as a “marketing contact,” which you’ll need to pay to host in the platform.
Note: To set up Workflows in HubSpot, users need to enable the following permissions: Marketing Access, Workflow Edit Permission, Lists Permission, Forms Permission, and Email Permission.
1. Map out your customer journeys
Before you open HubSpot, you need a clear picture of the journey your customers take—from initial conversion to final purchase. Otherwise, it’s easy to “automate for the sake of automating,” creating a tangled web that leads to a poor user experience.
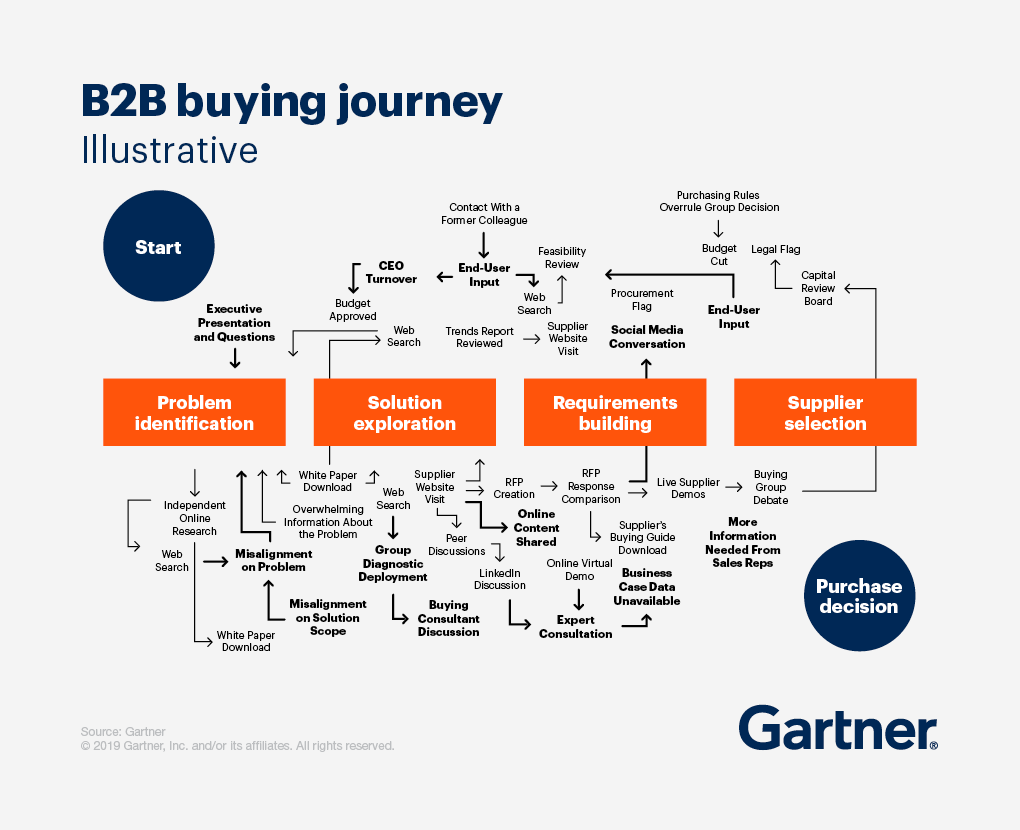
These customer journeys can be simple or complex, depending on how well-resourced your organization is and how granular your strategies are. For example, here’s a chart from Gartner we’ve referenced before that shows how complex a non-linear customer journey can be:
But there’s no reason to make things that complicated, especially if you’re just getting started with automations. Here are some examples of simple customer journey maps you can use (with examples of how we build them in Default):
Simple inbound lead routing for HubSpot users
CRM data management for HubSpot
Sales → implementation handoff
2. Identify dependencies, redundancies, and potential conflicts
Going straight from journey mapping to workflow building is a mistake. Journey mapping is a theoretical exercise. Workflow building is practical. And as with any activity, there’s always a gap between theory and practice.
For example:
- An inbound lead is qualified then distributed to the sales team. One week later, a contact from the same company fills out a demo form and is routed to a different rep, creating friction both internally and externally.
- A lead fills out a demo form but technically doesn’t check all the boxes on your lead qualification checklist. They’re sent to sales while simultaneously enrolled in a nurture sequence sending them a series of demo requests.
- Your lead routing sequence is dependent on data from third-party apps (e.g. Calendly, Typeform), but the integration is broken. That lead is either misrouted or lost.
The good news is that most of these challenges are easily mitigated. But HubSpot users often fail to think ahead, and thus are constantly firefighting once issues arise.
And let’s be real: you won’t identify all these issues in advance. There are just some things that come up only after you’ve rolled up your sleeves and built out your Workflows. But the more potential friction points and bottlenecks you identify early, the fewer things will break down as time goes on.
3. Catalog your necessary integrations
You’ll thank us for this one. If your HubSpot Workflows rely on multiple integrations to function—Calendly, Google Calendar, Apollo or Seamless lead enrichment, or Zapier to allow more complex functionality—the risk of a broken flow or revenue leakage is high.
The obvious first step is to take your customer journey maps and write down which tool(s) will handle that functionality. For example, if you have the following branch on your map:
Fill out demo form → Route to sales rep → Schedule meeting → Send confirmation email → Alert sales rep
You’ll want to write out which tools you’ll need for each functionality:
Then, you’ll want to not only verify that those tools integrate with HubSpot, but that the integrations function in the way you need:
- Data is mapped accurately and automatically to the correct field in the HubSpot CRM (e.g. Calendly meeting attendance records → HubSpot contact properties)
- HubSpot’s integration tools include the appropriate enrollment criteria and actions to automate your functionality (e.g. send an internal Slack notification)
- All your tools have the flexibility and granularity for you to tailor your automations to customer expectations, your sales flows, and business processes
Here’s an example of how this can go awry pretty quickly. When you set up the HubSpot and Calendly integration, all meetings scheduled through your Calendly account are synced with HubSpot. There’s no way to filter out meeting types or specific users. This requires a separate Zapier integration, which makes your tech stack that much more complicated and error prone.
If you list out your required integrations and how you’re going to overcome their weaknesses, you’ll save a lot of time and headaches as you build your HubSpot lead nurtures.
Alternatively, you could use a seamless, all-in-one sales workflow orchestration platform to monitor and coordinate your entire tech stack. Learn more about Default’s capabilities here.
4. Prepare your CRM properties
81% of B2B buyers encounter barriers to making key purchases online, and 75% of them consider switching suppliers due to a poor experience. Likewise, 75% of B2B buyers expect some form of personalization in their marketing materials.
So it’s a bad idea to simply dump all your leads and marketing contacts into a single lead nurture workflow without personalizing the experience. And the key to personalization is data.
You’ll need to configure your HubSpot properties to capture and accurately display the data you need to automate those customer journeys you’ve mapped. To update your properties in HubSpot:
- Select the Settings gear in the top menu.
- On the left-hand side, select Data Management > Properties.
- You’ll see a complete list of properties for all HubSpot objects. Use the default options, edit, or create your own.
- To edit a property, hover over the property you want to edit. Select Edit property.
- From there, you can change the property details, field type (i.e. radio, single-line text, number), set property conditions, and see where the property is currently being used in your HubSpot account.
- To add a custom property, select Create property.
- You’ll then be able to fully customize the property to meet your needs.
Note: When you set up integration apps in HubSpot, often new custom properties will be automatically created. Be sure to take stock of these and use them to your advantage—it may be easier than building new properties from scratch.
5. Choose your lead enrichment option
The more data you have on a particular lead, the more granular your lead nurturing efforts can be. It not only helps you qualify leads faster and more accurately, but you can also build more personalized sales workflows that will nurture your leads more effectively.
Basically, in 2026, lead enrichment isn’t a “nice to have.” It’s required—that is, if you want your automations to actually work.
When you’re building out lead nurturing workflows in HubSpot, you have five options for lead enrichment:
- Use HubSpot’s built-in Breeze Intelligence, which charges you each time it pulls in enrichment data
- Integrate HubSpot directly with Apollo, Seamless, or other enrichment tool (note: there are complications and challenges with each of these approaches)
- Manually import new data periodically—labor intensive and time consuming
- Build a custom API to integrate your enrichment data source directly with HubSpot—labor intensive, time consuming, and you may have some limited functionality
- Use an orchestration platform like Default that will automatically integrate waterfall enrichment, intent data, and other AI-powered insights with the HubSpot CRM
6. Build active and static lists
Leveraging HubSpot Lists in your lead nurture campaigns can be helpful in a number of ways. First, they can help you catalog your marketing segments and keep running tallies of different audiences. They can also be helpful for retargeting and remarketing specific segments.
Additionally, HubSpot Lists can help improve the user experience by creating suppression files. For example, if you’ve built a webinar promotion workflow and want to exclude pipelined contacts, un-enrolling or suppressing SQLs and Opportunities from that workflow can prevent mixed signals and unnecessary friction in the buying experience.
To build a list in HubSpot:
- Navigate to the left-hand menu. Select CRM > Lists.
- Once you’re in the Lists tool, select Create list.
- Select which object type you want the list to contain, then select Create.
- You can then define which objects will be entered into the list using a series of filters. These filters can apply both to the object’s own properties, as well as the properties of its associated objects (e.g. associated Deals, Companies).
- Select Review and save.
- On the menu that pops up, select whether you want to create an Active List or Static List.
- Active Lists only include objects that meet your filter criteria at any time. If an object no longer meets the criteria, it is removed from the list.
- Static Lists include objects that meet your filter criteria at the time of the list’s creation. You can manually add objects to the list later, but they won’t automatically roll on and off as their properties are updated.
- Select Save and process list.
7. Create your assets
Before you can build your marketing automations, you need to have something to automate. Once you’ve defined and built your segments and have an idea of where each marketing automation sits in the overall customer journey, you need to create the content assets that will move them down the funnel.
Assets typically deployed in HubSpot lead nurture campaigns include blogs and website content, emails, landing pages, videos, and more.
Some tips to keep in mind when creating and deploying content when nurturing leads:
- Buyers have a strong B.S. meter. If you’re just sending them fluff with no value, it’ll hurt rather than help your brand.
- On the other hand, don’t be scared to go for the hard sell. A top-of-funnel offer for a bottom-of-funnel prospect can be just as frustrating as the other way around.
- Consider your content in the context of the entire lead nurture automation. For example, the more frequently you email your prospects, the less information you need to include in each individual email.
- Balance timely with evergreen content. Both can help to build trust with your prospects. Just don’t forget to update/remove content that’s become outdated!
- Don’t be afraid to go back and update your content based on feedback from the sales team—otherwise you’ll quickly lose relevance
8. Build workflows
Now that all this prep and groundwork has been laid, now it’s time to build the actual workflows:
- On the left-hand menu, navigate to Automations > Workflows.
- Select Create workflow > From scratch > Contact based > Blank workflow. You can also create a workflow From template and browse the available options in the HubSpot Templates Library.
- Set your enrollment triggers. These can include specific events, filter criteria, a particular schedule, or when a webhook is triggered.
- Set your un-enrollment triggers. These include membership in a particular list, meeting a particular goal (e.g. lifecycle stage is changed to Customer), or when contacts no longer meet your enrollment criteria.
- Add actions. These include:
- Delay: Pause actions in the workflow
- Branches: Create an if/then path to route records to actions based on specific criteria
- Go to workflow: Enroll the record in another workflow
- Go to action: Consolidate if/then branches to route all records in the workflow back to a common action
- Communications: Send automated emails, social media posts, and other marketing communications to an external audience, and send notifications to internal users
- CRM: Create, update, and manage all properties of enrolled records
- Marketing: Add records to and remove them from lists, add and remove from ad sets, and set Marketing Contact status
- Data ops: Deploy custom code or webhooks, or format data associated with the record
- Connected apps: Trigger actions within apps integrated with HubSpot (e.g. send a Slack notification, add data to a Google Sheet, schedule a Zoom meeting)
- When you’re happy with your workflow, select Review and publish.
Note also that you can set other parameters within which the workflow can operate. Under the Settings tool, you can set your workflow to run or not run at specific times, or to turn off at a particular time.
Build as many lead nurture workflows as you like. But keep in mind that the more you build, the more dependencies and complications will arise. So it’s always important to test and validate that your workflows work the way they claim to.
9. Monitor RevOps KPIs
The ultimate goal of any lead nurture or marketing automation campaign—whether you’re using HubSpot or another tool—is to accelerate revenue. So it’s critical to continually track RevOps KPIs to ensure things are always moving in the right direction.
HubSpot offers a number of tools to help you do that:
- Dashboards give you a snapshot into performance over a given period of time—either a set or rolling date range
- Lists help you keep tabs on how many contacts you’re creating for each of your segments
- Campaigns help you track how all your different assets are contributing to specific goals—conversion rates, attributed revenue, etc.
Why is an effective lead nurturing strategy important?
Depending on which data you read, anywhere from 40 to 75% of leads aren’t ready to buy immediately. But if you wait to contact them until they are ready, your competitors have ample opportunity to swoop in and steal what otherwise could have been your business.
Lead nurturing keeps your brand and product top of mind as prospects move through their buying journey. Obviously success with lead nurturing is predicated on a number of factors, including:
- Content quality—are you actually adding value to your buyers’ lives and work?
- Automation quality—are you engaging leads at a reasonable cadence? Are you sending timely messages based on their demonstrated level of engagement?
- Follow-up quality—you can nurture all the leads in the world, but if no salespeople are reaching out to them after the fact, you won’t generate any business
With those caveats, here are some of the benefits you can get from effective lead nurturing.
Shorter sales cycles
Nurtured leads have a 23% shorter sales cycle than those who go uncontacted. This makes sense: the vast majority of leads have no built-in sense of urgency. You have to create that urgency by keeping their problem, pain, and your solution top of mind.
Higher conversion rates
If you don’t actively nurture your leads, only the ones immediately ready to buy will convert into customers. You may get a few stragglers down the line, but the majority of your contacts will go untouched, leading to significant missed opportunities.
Higher marketing ROI
If you can accelerate your pipelines and increase conversion rates, you’ll generate a more immediate, demonstrable ROI for your marketing activities. This can help to justify further investment, thus opening up more opportunities down the line.
Increased sales efficiency
When done well, lead nurturing can lead to a prospect base that’s a) more keenly aware of their problem and its urgency, and b) more educated about your solution and its advantages. This reduces sales friction and can help your reps work more efficiently.
Better lead quality
In that same vein, lead nurturing, when paired with ongoing monitoring and real-time engagement data, can identify leads at their highest point of engagement (e.g. they’ve opened three consecutive marketing emails, visited your pricing page twice). This can lead to engagements with higher quality leads.
For B2B buyers, lead nurturing can also equip leads with the resources, answers, and proof points needed to convince other members of their buying units. This is critical for engaging large, enterprise accounts.
Content types to use for lead nurturing
We mentioned before about building out different creative assets to deploy in your lead nurture campaigns. Now, let’s dive into some ideas about how these content types could feature across your campaigns.
Blogs & informational content
Often revenue leaders think about blogs and informational content as having exclusive SEO value. And while SEO is important, blog content can also be a lynchpin in your lead nurture campaigns.
The goal of blogs or other top of funnel informational content should be to:
- Clarify the problem and make it concrete to the reader
- Demonstrate you have the knowledge and expertise necessary to solve the problem
- Offer valuable information that makes their lives and work easier right away—do NOT put all the good stuff behind a landing page
- Build rapport and trust with the audience by demonstrating your empathy
A good piece of content should do all four. But if you’re hitting three out of the four consistently, you’ll be killing it.
If you send content that does the things described above consistently enough, you’ll find many of those leads will come to you once they’re ready to buy.
Landing pages
Landing pages are a bit different from informational content. Rather than educate and engage the buyer, the goal is to drive a real-time conversion in the moment.
Sending a landing page to a lead before they’re ready for a sales conversation is counterintuitive. While, yes, the content and messaging on the page could help push them over the edge (especially if you have proof points and success stories), you may have a hard time convincing prospects that aren’t almost there.
One potential strategy is to create a Branch in HubSpot that sends an email promoting a landing page to leads with a HubSpot Score or Likelihood to Close that’s lower than your qualification threshold, but high enough that one more engagement could qualify them.
Product & pricing pages
As your lead nurture efforts continue, some of those prospects will be intrigued enough to dive deep into what you have to offer. Even if they aren’t ready to buy now, you want to make these pages easy and accessible.
The two most common pieces of content for mid- to bottom-of-funnel buyers are product and pricing pages. Buyers want to know what you offer and what’s the ROI, and these pages should give them all the information to answer those questions.
Using a Branch like the ones we recommend for landing pages to deploy these based on the buyer’s interest. If you hit a lead with a pricing page too early in their journey, it could end up being counterproductive.
Case studies
While some companies use case studies in the middle of the funnel, their most common use case is actually at the bottom of the funnel. You have a lead that’s been qualified and is looking to buy, but they need some additional proof points to convince themselves—or their colleagues—that the deal is worth it.
This raises an important point a lot of revenue orgs miss: lead nurturing doesn’t stop after you hand the prospect over to sales. Instead, you should continue to use your marketing automation tools to provide “air cover” while sales goes and secures the deal.
Case studies are a great piece of content to deploy in those campaigns.
Videos
72% of B2B buyers prefer video to text when researching potential products. Reasons for this could include ease of consumption, authenticity, and an easier time identifying intangible details about the company’s personality that are harder to get with the written word.
One idea for using videos in nurture sequences is to send video messages from the assigned sales rep to the lead. This can be a good way to build rapport, put a face to the brand, and reduce friction for upcoming sales conversations.
Emails
Of course, you can have all the content in the world, but you need to get it to your target audience. Email is a great distribution channel, especially for those leads who have already filled out a form in some capacity.
But email is more than just a distribution channel—it’s a content form in its own right. And there are plenty of ways to use email in a nurture campaign:
- Drip campaigns to educate buyers and drum up interest in your product
- Bottom-of-funnel sales messaging to convince warm leads to schedule a demo
- Communications with leads before and after a sales meeting
- Sequences to help re-engage lead dropoffs (i.e. cancellations, rescheduling, no-shows)
Examples of lead nurture workflows in HubSpot
Now let’s dive into some specific, real world examples of lead nurture workflows you can build in HubSpot.
1. Lead scoring & segmentation
Workflow goal
Segment leads into different nurture sequences based on lead score.
Before you start
- Determine whether you want to use manual or predictive lead scoring in HubSpot. Manual lead scoring will use the “HubSpot Score” property. Predictive lead scoring will use the “Likelihood to close” property.
How to build
- Navigate to the Workflows tool. Select Create workflow > From scratch > Blank workflow. Set Contacts as the workflow object.
- Select Enrollment triggers. Select When filter criteria is met.
- Select Contact properties > HubSpot score (or Likelihood to close)
- Set the minimum value you want the contact to be (in this example, we’ll say 50).
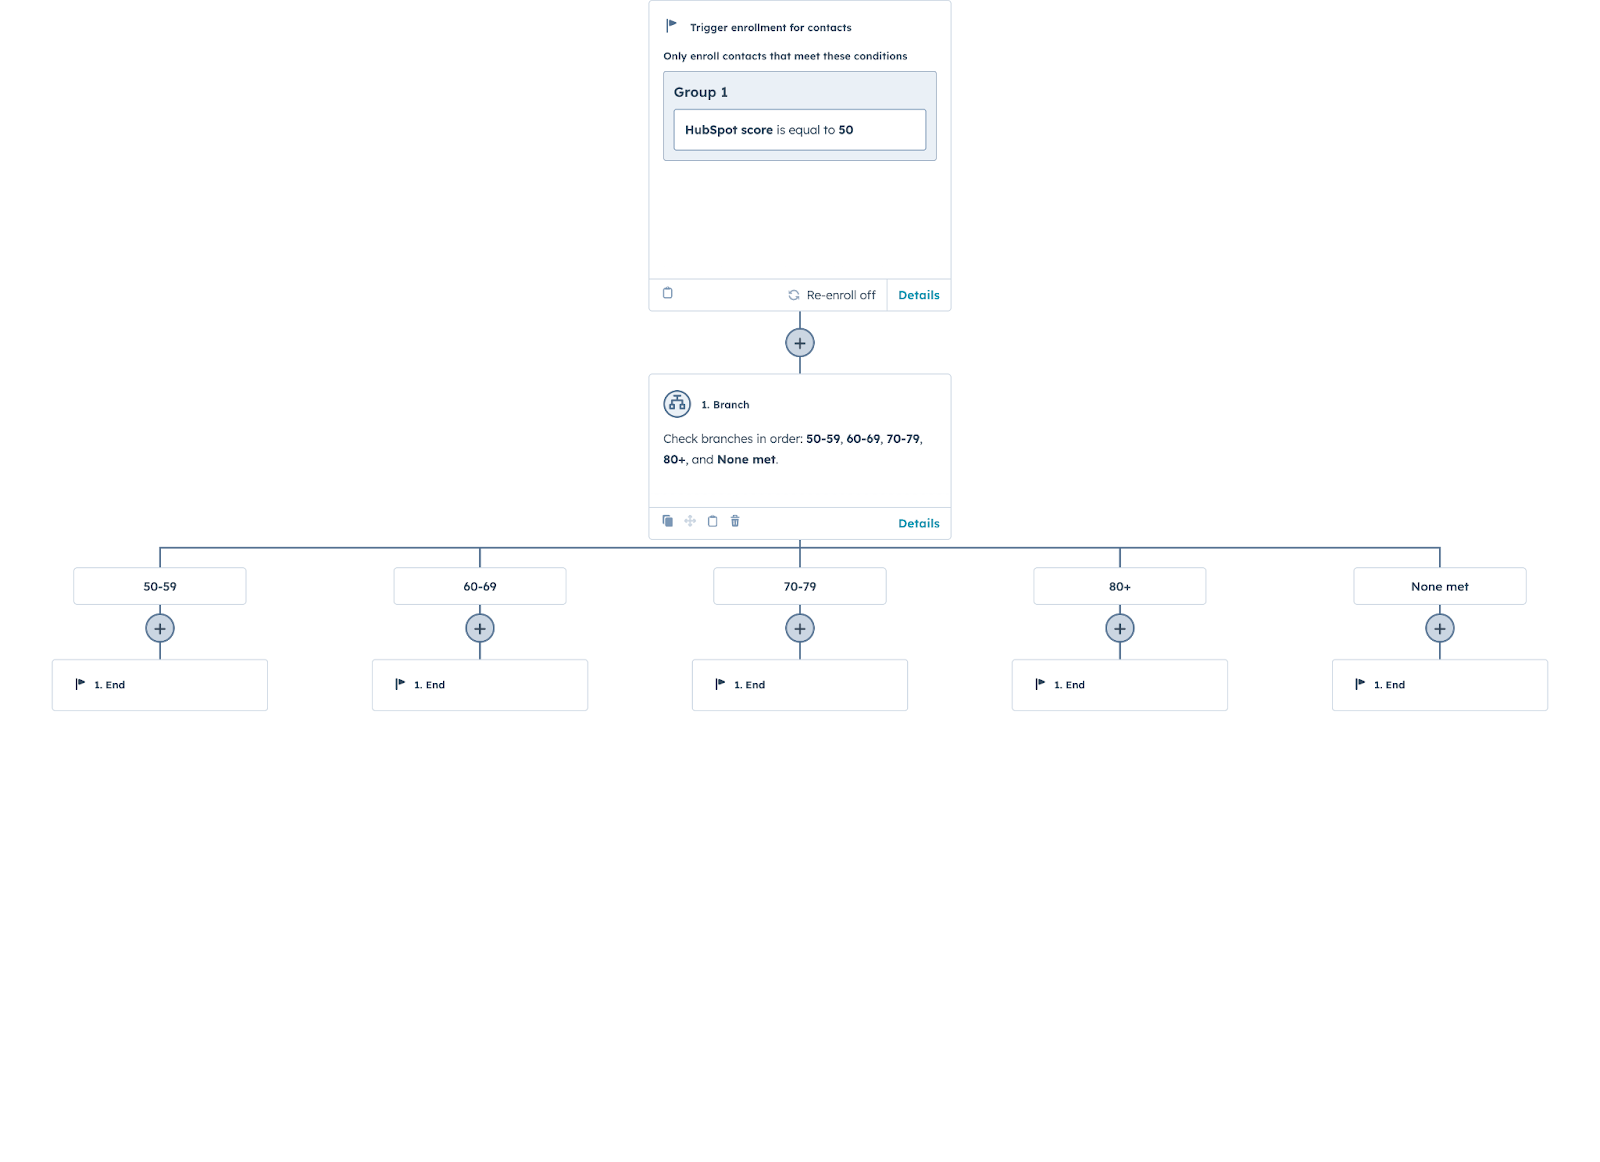
- Add a Branch. Set the property to branch on as HubSpot score.
- Add multiple branches based on the number of variations you want to have. For example, you set Branch 1 is less than or equal to 75, while Branch 2 is greater than 75.
- For each branch, add a series of actions—Emails, Delays, or workflow enrollments—to tailor your communications based on how high their score is.
- Select Review and publish. Follow the prompts to complete your workflow.
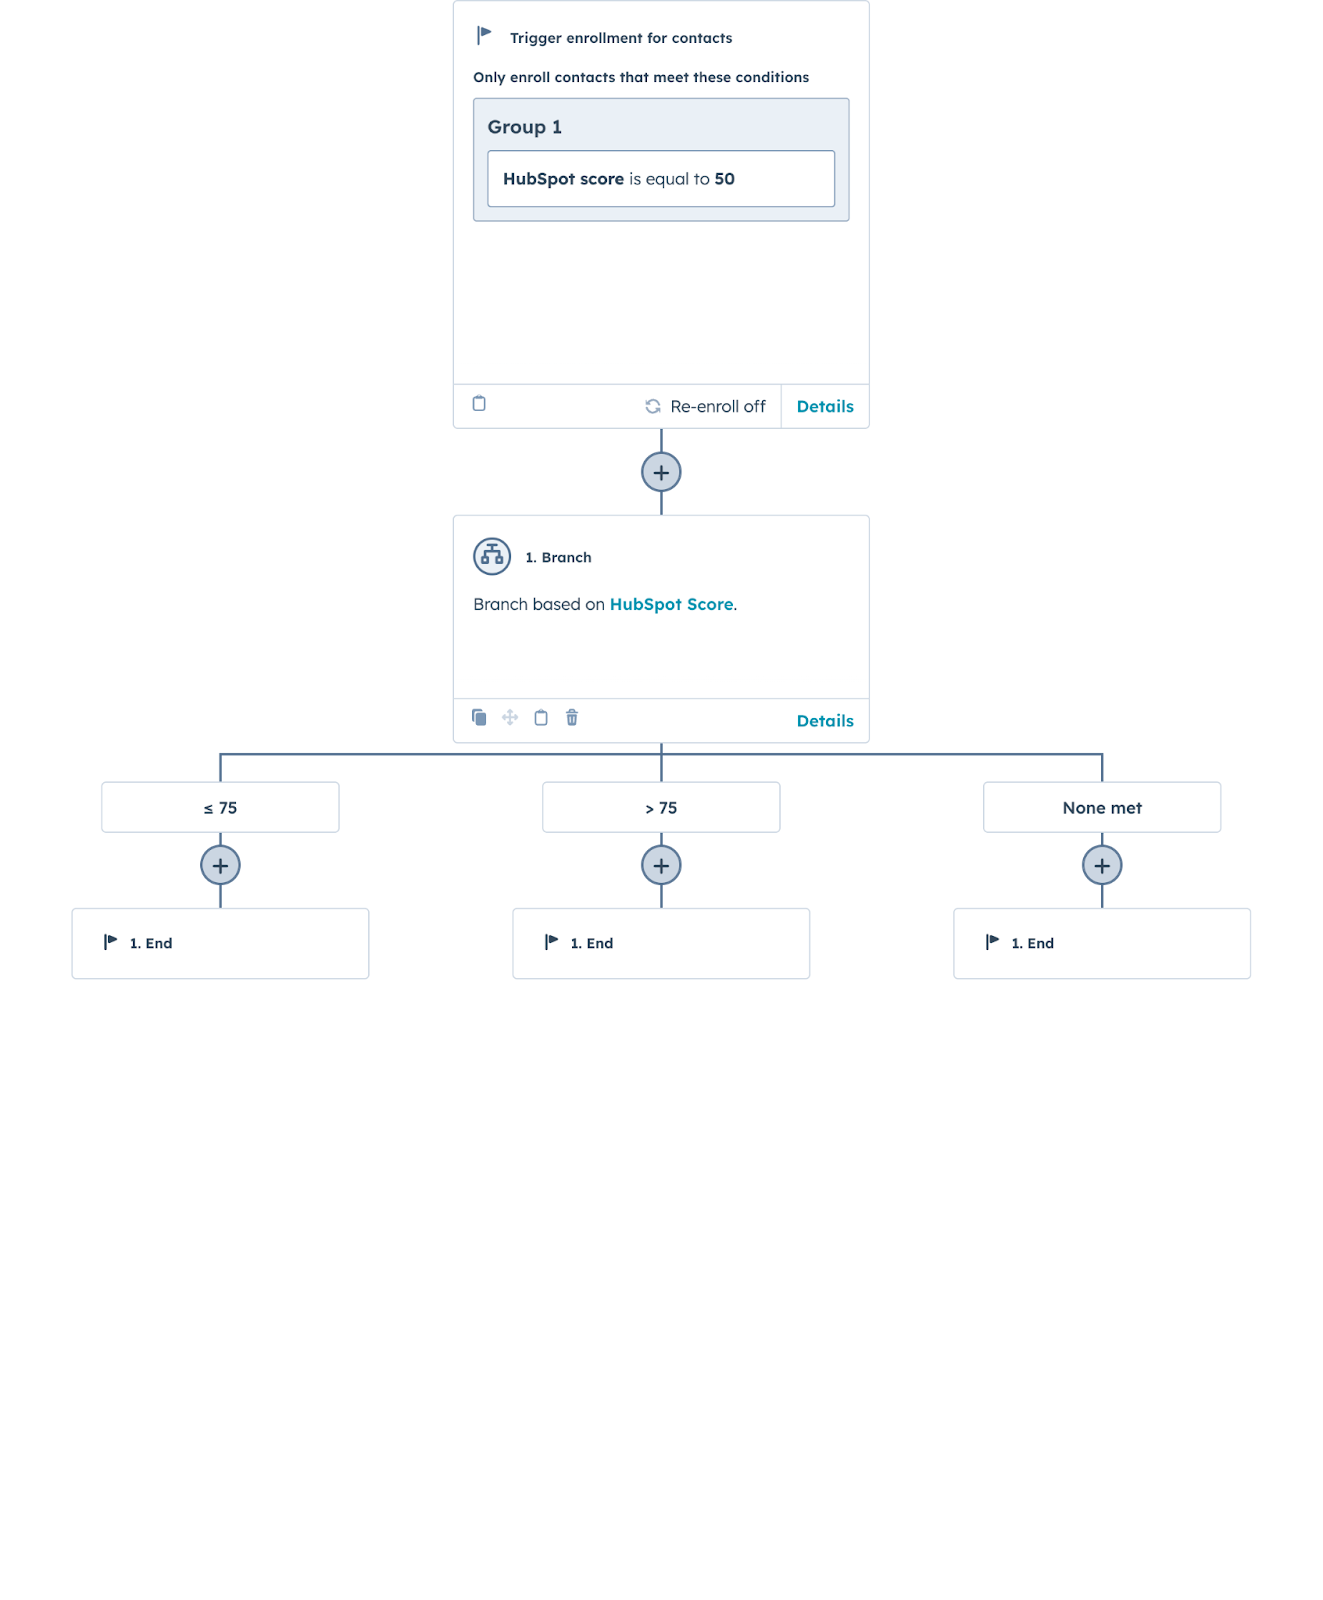
If you want to branch based on multiple lead values, you’ll need to create a branch using AND/OR logic, where you’ll essentially create a waterfall approach to checking each lead score. See below:
2. Unenrollment and adding to a sales sequence
Workflow goal
When a lead is classified as an MQL, un-enroll that lead from all existing marketing sequences and enroll them into a sales sequence.
Before you start
The challenge with this workflow is the number of dependencies involved. While you can un-enroll contacts from other workflows automatically, you can’t delay that action to account for other dependencies. As such, this functionality will require two workflows to build.
How to build
Workflow #1
- Navigate to the Workflows tool. Select Create workflow > From scratch > Blank workflow. Set Contacts as the workflow object.
- Do not set any enrollment triggers. Contacts will be enrolled manually.
- Add Action: Enroll in sequence. Select the sales sequence you want to enroll your contacts in.
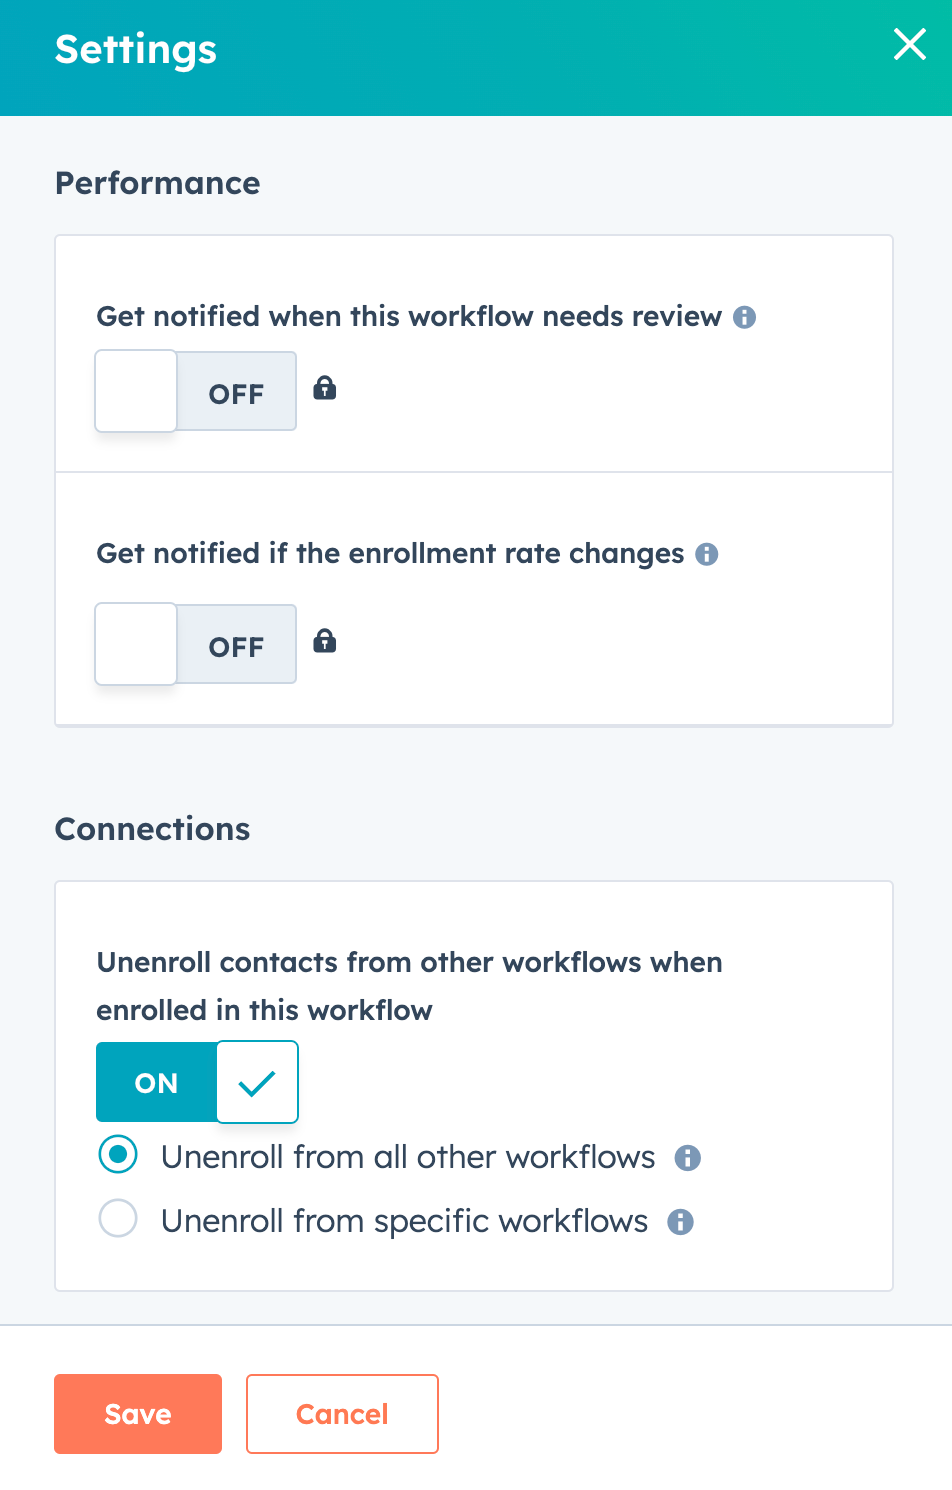
- Under Settings > Connections, select Unenroll from all other workflows. Select Save.
- Select Review and publish.
Workflow #2
- Navigate to the Workflows tool. Select Create workflow > From scratch > Blank workflow.
- Select Enrollment triggers. Select When filter criteria is met.
- Select Contact property > Lifecycle stage > is any of Marketing Qualified Lead
- Add action: Delay > For a set amount of time > 15 minutes (or however long you need for your routing sequences to run their course)
- Add action: Enroll in workflow. Select Workflow #1 that we just created above.
- Select Review and publish.
An alternative option would be to un-enroll contacts from specific workflows in Workflow #1, thus eliminating the need for Workflow #2. However, this will only work for the other workflows in existence at the time this workflow is created. Contacts will not be unenrolled from any workflows created after the fact, creating more opportunities for redundancies.
3. Reengagement campaign
Workflow goal
Deploy a series of marketing emails to contacts who have not engaged with your company for the last six months. Unenroll them once they achieve the lifecycle status of Marketing qualified lead.
Before you start
This is a standard marketing workflow that most revenue leaders have some familiarity with. However, there are some challenges to building it in HubSpot:
- Rigid definitions of “engagement” (e.g. website, email, social media) that don’t adapt to real user behaviors
- No use of intent data, which is critical to effectively qualify leads and time appropriate sales communications to them
- This structure doesn’t account for double backs on the customer journey (e.g. an Opportunity that Closed - Lost, and could potentially be reactivated during this campaign)
So while we’ll walk how to build a simple reengagement nurture workflow in HubSpot, note that there are some serious drawbacks to this approach that will almost certainly result in missed opportunities.
How to build
- Navigate to the Workflows tool. Select Create workflow > From scratch > Blank workflow.
- Select Enrollment triggers. Select When filter criteria is met.
- There are plenty of options to choose from. For this example, we’ll focus on the following:
- Contact properties > Last email marketing open date is {six months ago}
- Contact properties > Last email marketing click date is {six months ago}
- Page views > Contact has not viewed at least one URL containing {product / product page identifier} > Refine this filter > Date > is on or before {six months ago}
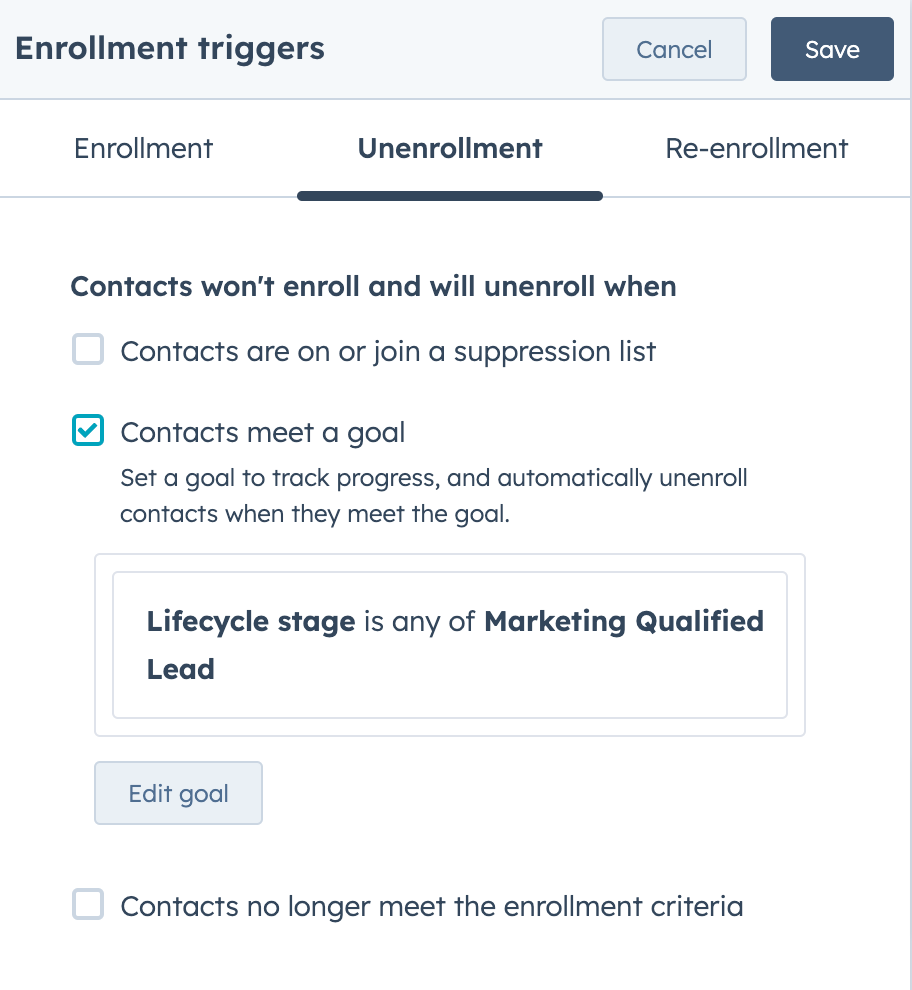
- Select Unenrollment. Select Contacts meet a goal. Set the goal to Lifecycle stage is any of Marketing qualified lead.
- Optional: Add a Branch based on specific criteria (e.g. industry, HubSpot owner, company size) to further personalize the campaign)
- Add Action: Communications > Send email. Add the first email in your re-engagement campaign.
- Repeat the action for each email and branch in the campaign.
- Select Review and publish.
Which lead nurturing tools should you use with HubSpot?
Throughout this article, we’ve already mentioned some of the drawbacks of HubSpot lead nurturing: difficult integrations, rigid workflow logic, challenges with data mapping, and more.
That’s why we recommend using several other lead nurture tools. You can keep HubSpot as your CRM without being locked into its challenges as an automation and workflow tool.
Default
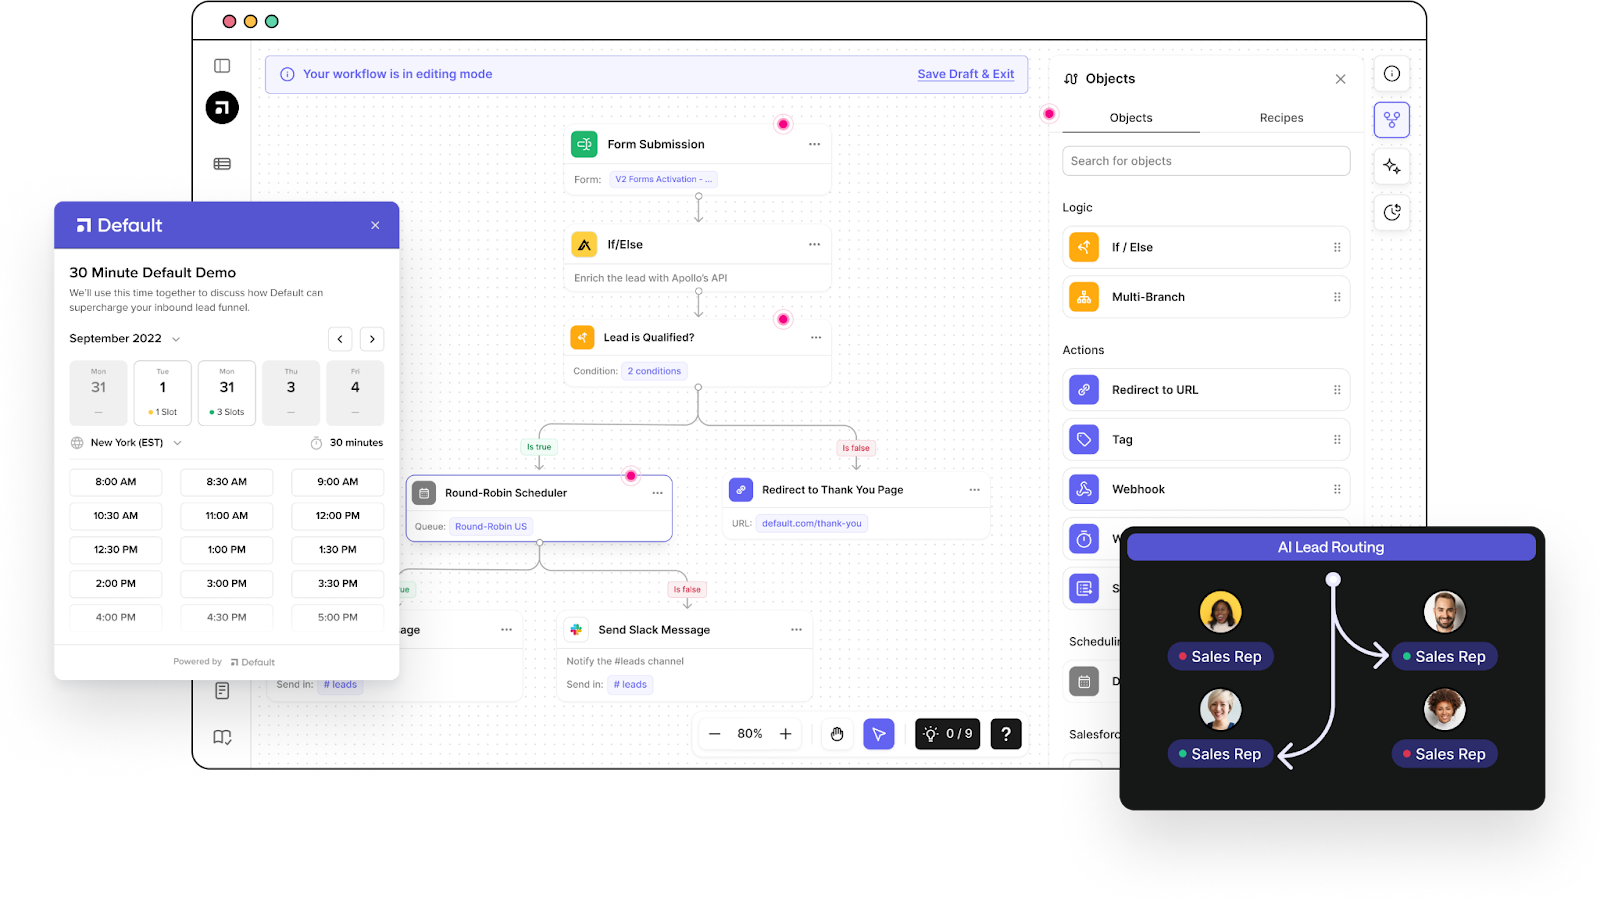
Gone are the days where “lead nurturing” is just a drip campaign. Modern B2B buyers are savvier and expect a more personalized, tailored engagement with your brand. When it comes to lead nurturing, Default is the only all-in-one solution that automates every step of the journey:
- Capture leads and book meetings at the point of conversion, improving booking rates by 240X
- Built-in waterfall enrichment with Apollo and Clearbit data, AI-sourced insights, and real-time intent data
- Real-time lead qualification
- AI-powered lead routing that utilizes more than just round robin routing rules
- Integration and orchestration with Slack, Outreach, Salesloft, Zoom, Salesforce, and more RevOps software
Default is the only workflow platform that both automates lead nurturing and orchestrates all the other capabilities you need to effectively target and engage leads.
Calendly
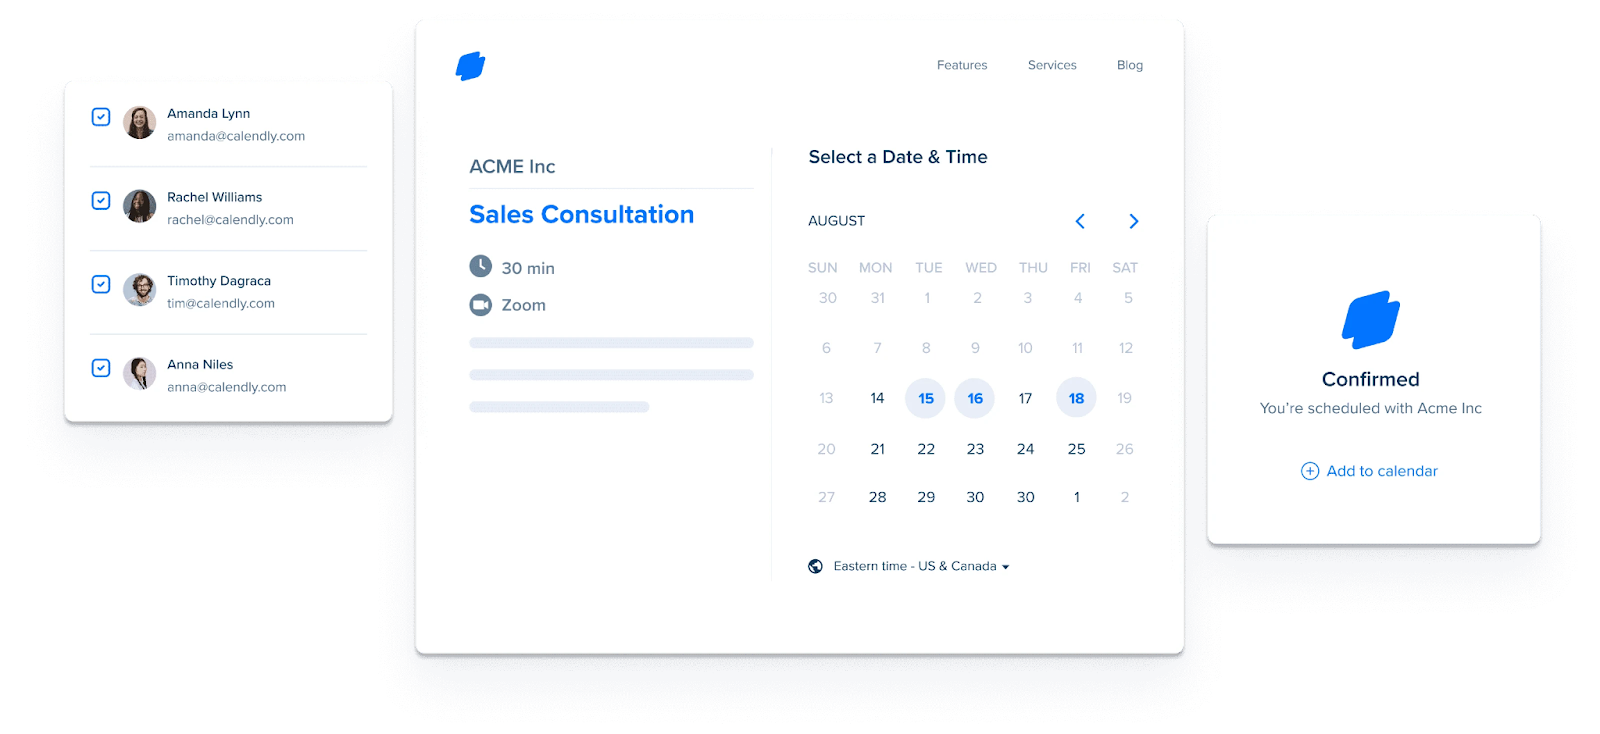
Most organizations start booking meetings before they purchase marketing automation or CRM software. So odds are your team is using Calendly before you implement HubSpot. Instead of switching scheduling tools, most teams opt to integrate the two platforms.
There are plenty of advantages to using Calendly instead of the HubSpot Scheduler, including:
- More meeting types and customization options
- Embeddable conversion forms that can better align with your visual identity
- Easier to use on both the back and front end
Unfortunately, the HubSpot & Calendly integration leaves much to be desired, and we’ve documented those drawbacks. Instead, we highly recommend using Default’s sales scheduling tool to book meetings at the point of conversion.
Slack
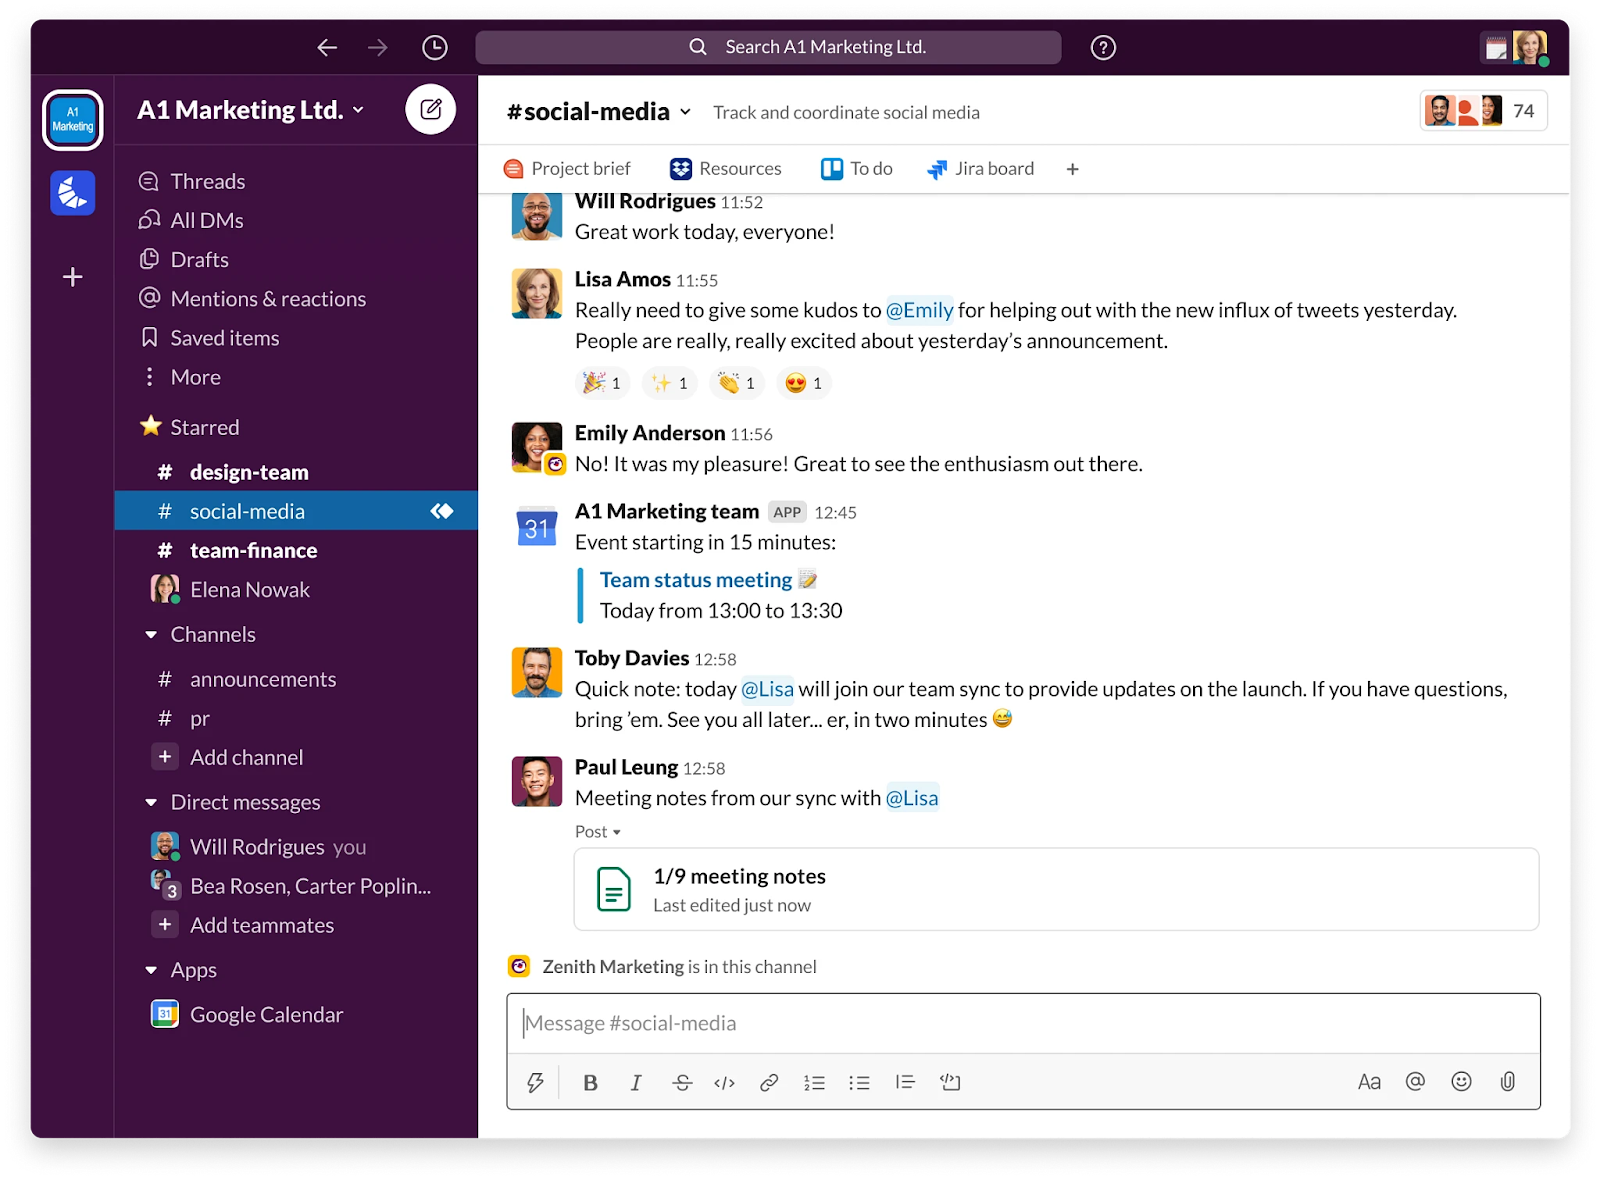
Image source: Slack
Technically, HubSpot can send internal notification emails to users when a lead converts, is qualified, or engages in a specific sales activity. But given how crowded your reps’ inboxes are already, it doesn’t really make sense to flood them with even more.
We highly recommend using HubSpot’s Slack integration to send instant notifications to your sales reps. That way, they’ll see lead assignments in real time—leading to fewer ignored leads and revenue leakage.
Apollo
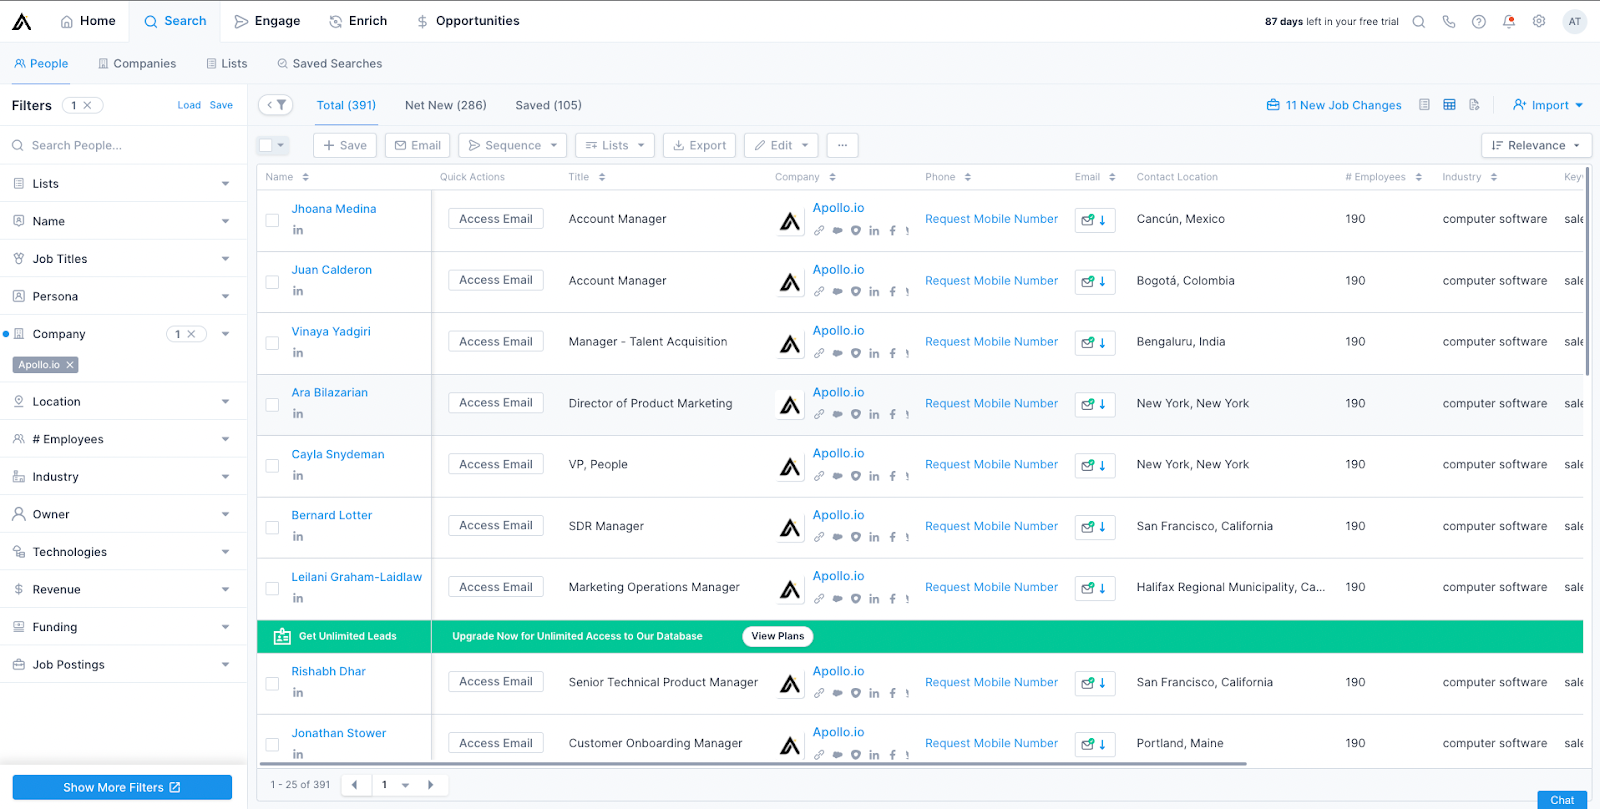
After acquiring Clearbit in December 2023, HubSpot incorporated their data into the platform as Breeze Intelligence. While users can now enrich their records directly from HubSpot, there’s a credit-based pricing system for each enrichment.
What’s more, if you want to automate lead enrichment in HubSpot, you’re looking at an all-or-nothing proposition. You can’t use a Workflow to decide which leads to enrich and which to exclude. This can result in costs getting out of control.
That’s why we recommend using a third-party enrichment solution like Apollo with a more cost effective pricing model (i.e. monthly rates). Using Apollo with Default, you can create conditional enrichment workflows. That way, you’re not wasting money learning about leads you know aren’t going to buy.
Lead nurturing FAQs
What are the statistics on lead nurturing?
There are a number of statistics that point to the benefits of lead nurturing. Consistent lead nurturing can increase sales by as much as 50%. Additionally, somewhere around 80% of leads may not convert into customers without adequate lead nurturing.
What is an example of a lead nurturing strategy?
Although lead nurturing is often conflated with the “drip campaign,” an effective strategy is far more comprehensive than automated emails. An example of a lead nurturing strategy includes documented personas, a clear customer journey map, lists of dependencies and tech requirements, stunning creative and value-packed content, and an automation platform that can deploy that content to the right buyer at the right time.
What is the ROI of lead nurturing?
It is difficult to pin down the exact ROI of lead nurturing. One study shows that lead nurturing can increase total sales by as much as 50%, while another suggests a 20% increase in average deal size.
How do you automate lead nurturing?
The best way to automate lead nurturing is with a marketing automation platform. Default, HubSpot, Marketo, Salesloft, and Outreach are some of the category leaders.
Enhance your lead nurturing strategy and sales workflow with Default
Although HubSpot has plenty of features that are essential for lead nurturing—CRM, email automation, sales enablement capabilities, etc.—it should not serve as the backbone of your campaigns. Instead, you should opt for a sales workflow solution that has the flexibility and orchestration capabilities you need to nurture modern B2B prospects into customers.
Default is the only all-in-one platform that automates, orchestrates, and seamlessly manages your lead nurture strategy. The best way to learn about the platform is to see it in action—schedule a demo today.
Discover how to automate, orchestrate, and manage your entire strategy with Default's powerful Sales Workflow Software.
Conclusion

Former pro Olympic athlete turned growth marketer. Previously worked at Chili Piper and co-founded my own company before joining Default two years ago.
Run revenue as an engineered system
Revamp inbound with easier routing, actionable intent, and faster scheduling




.png)
